Emergency Roof Patching 101: Stop Leaks Fast on Asphalt Shingles
Patch asphalt shingle roof damage immediately when you see a missing, cracked, or lifted shingle—because one failed tab can become a water entry point. Asphalt shingles cover roughly three-quarters of U.S. homes, which makes single-shingle repairs one of the most common (and highest-ROI) homeowner maintenance tasks. For homeowners who want a pro to handle it end-to-end, start with our Central Texas roofing team for fast inspections and repairs.
Emergency first step (answer-first): If water is actively entering your home, schedule 24/7 emergency roof repair immediately and contain interior damage (bucket + towels + move valuables). If you need help now, call EMC Remodeling & Roofing at (254) 218-6900.
Quick Answer: How to Patch an Asphalt Shingle Roof
- Break the seal on the shingle above the damaged one using a flat pry bar
- Remove nails holding the damaged shingle, using a wood block as a fulcrum
- Slide out the old shingle and inspect underlayment
- Install the new shingle, aligning it with surrounding shingles
- Secure with four 1 1/4-inch galvanized roofing nails below the tar strip
- Seal with quarter-sized dabs of roofing cement under tabs
A properly executed shingle patch is a permanent repair because it restores the roof’s water-shedding layer and wind resistance. In Central Texas, wind-driven rain and hail make speed matter: the longer the roof is open, the higher the odds water reaches the decking and insulation.
If your issue involves more than a couple shingles, skip DIY and book professional roof repair service. If you suspect storm damage, compare your symptoms with our hail damage roof repair service.
Handy patch asphalt shingle roof terms:
Identifying Roof Damage: Repair or Replace?
Determining whether your asphalt shingle roof needs a simple patch or a full replacement is the crucial first step. A small, isolated issue can often be resolved with a targeted repair, saving you significant time and money. However, ignoring widespread problems or deeper structural damage can lead to much more expensive headaches down the line. Roughly 20% of all roofing maintenance is just patching work, highlighting its common and valuable role in extending your roof’s life. Homeowners in Central Texas who combine timely patches with periodic professional roof inspections and repairs consistently get the longest service life from their shingles.
Signs That a Patch Is Sufficient
If you’re noticing one or two issues clustered together, a patch is likely all you need. We’ve found that these localized problems are excellent candidates for a DIY approach:
- Localized damage to one or two shingles: This is the most straightforward scenario. Perhaps a single shingle was cracked by a falling branch or blown off during a strong gust of wind. If the surrounding shingles are in good condition, a quick patch can restore your roof’s integrity.
- Curled or cracked shingles in a small area: Over time, shingles can curl or crack due to sun exposure and age. If this is happening to only a few shingles in an isolated spot, we can often carefully lift and replace them, or even re-adhere curled edges with roofing cement.
- Minor granule loss: Granules protect your shingles from harmful UV rays. If you see small areas of granule loss on a few shingles, especially if the underlying asphalt isn’t completely exposed, a roof sealant can sometimes restore the protective layer and prevent further deterioration.
- Small punctures or holes: A stray nail, a dropped tool, or even an ambitious bird can create a small hole. As long as the damage is contained to a single shingle and doesn’t extend to the underlayment or decking, a patch is usually sufficient.
A single damaged shingle is a critical weak point and an open invitation for water damage. Addressing it promptly is key to preventing larger problems.
Indicators That a Full Replacement Is Needed
While patching is a great solution for minor issues, there are clear signs that your roof is telling you it needs more than just a quick fix. Ignoring these red flags can lead to structural damage and costly interior repairs.
- Widespread damage across multiple roof sections: If you see damage scattered all over your roof, or if a large number of shingles are affected, that’s a clear sign of a bigger, more systemic issue that a patch job won’t fix. This often indicates the entire roof is nearing the end of its lifespan.
- Shingles over 20 years old: While a properly installed roof can last 20 years or more, asphalt shingles typically have a lifespan of 15-30 years. If your roof is approaching or exceeding this age, even minor damage might be a symptom of widespread deterioration, making a replacement a more cost-effective long-term solution.
- Extensive granule loss creating “bald” spots: If you find excessive granules in your gutters or notice large, bald patches on your shingles where the asphalt is clearly exposed, the shingles have lost their primary protection against UV rays. This widespread deterioration signals that the entire roof is compromised and needs replacement.
- Soft or spongy roof decking: This is a critical indicator of water damage beneath the shingles. If you feel soft or spongy spots when walking on your roof, it means the roof decking (the plywood or OSB beneath the shingles) is rotting. This requires immediate professional attention and usually necessitates a full tear-off and replacement.
- Multiple active leaks in different rooms: While a single leak might be traceable to a specific shingle, multiple leaks in various parts of your home suggest widespread roof failure. This is a strong indicator that the entire roofing system has lost its ability to shed water effectively.
A professional inspection is recommended for widespread damage or if you feel soft spots on the roof deck, which indicate rot. While patching a single shingle is incredibly affordable, typically costing between $100 and $300, a full replacement is a significant investment. We can help you assess the extent of the damage and determine the most cost-effective solution for your home in Temple, TX, or Leander, TX. Learn more about hail damage roof repair if severe weather has impacted your roof. If it’s time for a new roof, explore our roof installation services.
Step-by-Step: How to Patch an Asphalt Shingle Roof
A properly executed patch is a permanent solution, not a temporary fix. When done correctly with the right materials, the new shingle becomes an integral part of the roofing system and should last as long as the surrounding shingles. Follow these steps to ensure your repair integrates seamlessly and lasts as long as the rest of your roof. Homeowners who prefer a turnkey solution can always schedule professional roof repair and emergency roofing services to have an expert handle the entire process.
Step 1: Prioritize Safety and Gather Your Tools
Before we even think about touching the roof, safety is paramount. We always say, “Your safety is worth more than any repair!” Never attempt roof repairs in the rain or on a wet, icy, or high-wind day. The ideal conditions are a mild, dry, and overcast day, typically between 50°F (10°C) and 80°F (26°C). Extreme heat can make shingles soft and easy to damage, while cold weather can make them brittle and prone to cracking.
Essential Tools and Materials:
- Flat pry bar: Your best friend for lifting shingles and removing nails. A flat pry bar with a wood block as a fulcrum is better than a regular claw hammer for lifting shingles and prying out nails, as it protects the surrounding roof.
- Hammer: For securing new nails.
- 1 1/4-inch galvanized roofing nails: These are crucial for securing the new shingle. Galvanized nails resist rust and corrosion.
- Utility knife: For cutting and trimming shingles if needed.
- Caulking gun: To apply roofing cement precisely.
- Asphalt roofing cement: For sealing the new shingle and nail heads. We’ll discuss this more later, but choose a high-quality product designed for asphalt shingles.
- Replacement shingles: Ensure these match your existing shingles in color, material, and quality. If you can’t find an exact match, finding a shingle that is as close as possible in color and style is your priority. A mismatched shingle is always better than a leaky one.
- Safety gear: Non-slip boots, heavy-duty gloves, and safety glasses are non-negotiable. For steep roofs, a safety harness is also essential.
Ladder Safety: Always use a sturdy ladder and position it correctly. We recommend the 4-to-1 rule: for every four feet of height, the base of the ladder should be one foot away from the wall. The ladder should also extend at least three feet above the roofline to provide a stable handhold as you transition on and off the roof. Read our essential safety guide for working at heights for more in-depth safety protocols. Always work on a dry, mild day.
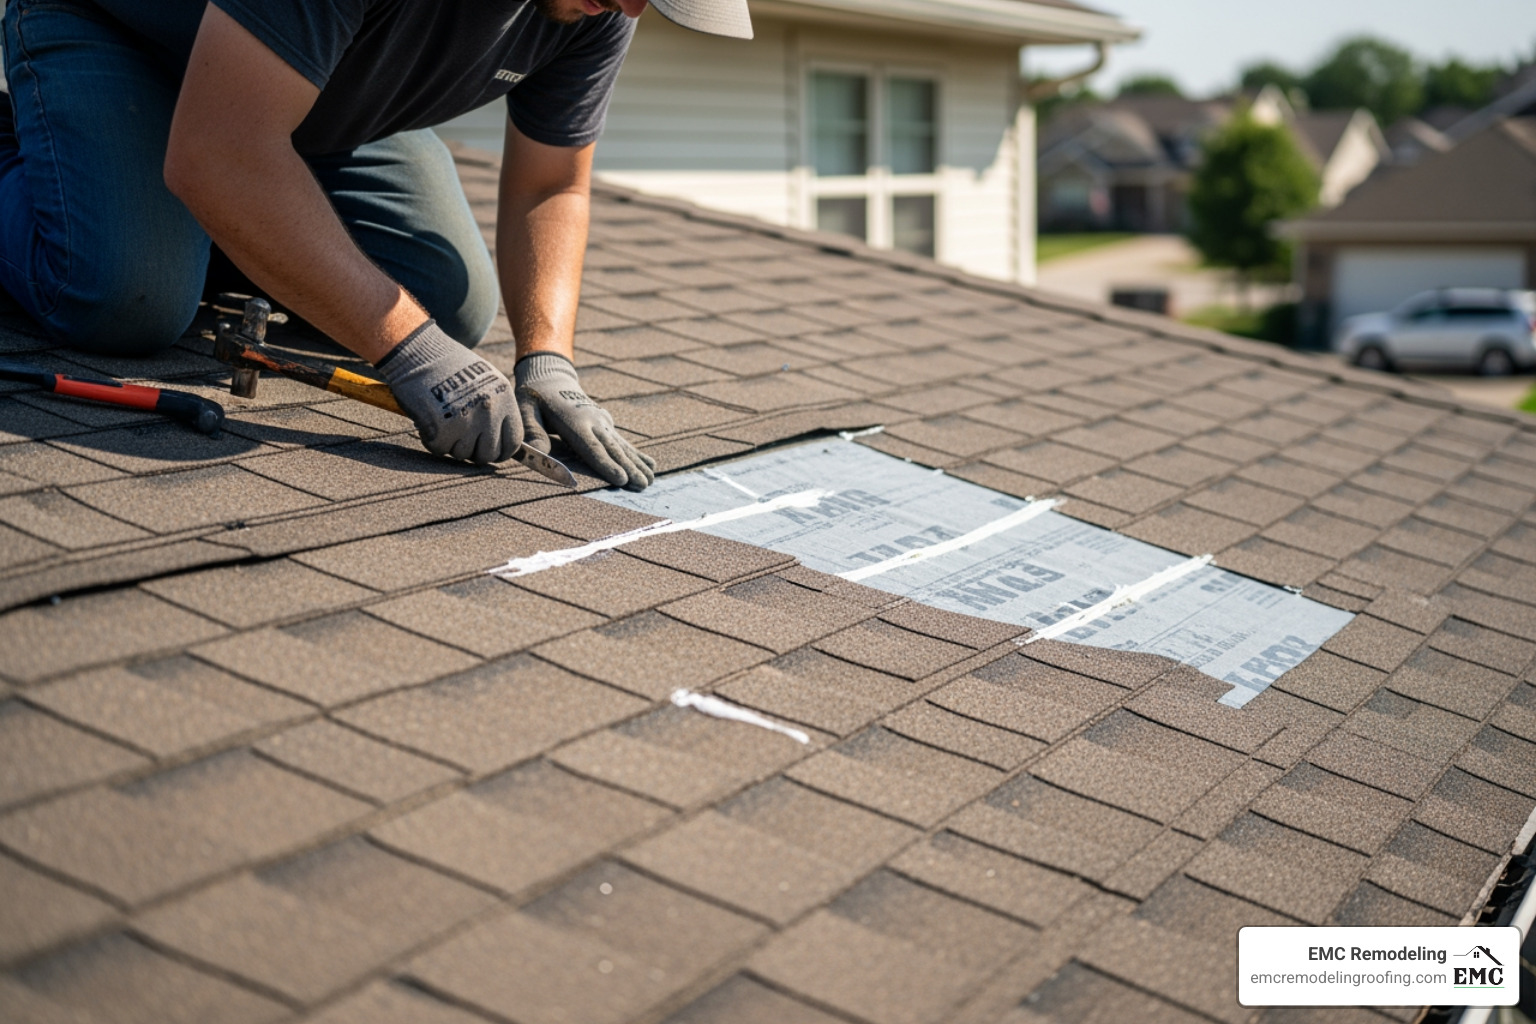
Step 2: Remove the Damaged Shingle
Now that we’re safely on the roof with our tools, it’s time for the delicate work of removing the damaged shingle without causing further harm.
- Gently break the adhesive seal: Asphalt shingles are designed with sealant strips that bond them together, providing wind resistance. Using your flat pry bar, carefully slide it under the shingle directly above the damaged one. Gently pry upwards to break the sealant bond. This process is often easier in cooler weather, as the sealant is less gooey and tenacious. Exercise care to avoid distorting or cracking the overlying shingles, especially if they are brittle from age or cold.
- Locate and carefully remove the nails: The damaged shingle is held in place by nails that also penetrate the shingle above it. Slide your pry bar up tight to each nail area and pry upwards on the shingle to lift the nail out of the deck. If nails are driven deep, and you have access to the attic, you can sometimes go into the attic and drive them out slightly (about 1/4 inch) from below to make them easier to remove from the roof surface. Be sure to remove all nails associated with the shingle.
- Slide out the old shingle and inspect the underlayment: Once all nails are removed and the seals are broken, the damaged shingle should slide out. After removal, take a moment to inspect the roofing underlayment (the material beneath the shingles, typically felt paper). If you notice any tears or damage to the underlayment, we recommend repairing it with a patch of 30# tarpaper, as it’s stiffer and easier to work with than 15# tarpaper. Secure any underlayment patches with roofing cement.
Step 3: Install and Seal the New Shingle
With the old shingle out and the underlayment inspected, we’re ready to put the new one in place. This is where we ensure a watertight and durable repair.
- Slide the new shingle into position: Carefully slide your new, matching shingle into the vacant spot. Make sure it’s perfectly aligned with the surrounding shingles and that its bottom edge lines up correctly with the course below.
- Secure it with four galvanized roofing nails: Using your hammer, drive four 1 1/4-inch galvanized roofing nails into the new shingle. Place them about one inch in from each side of the shingle, just below the tar sealant strip. This ensures the nails will be covered by the overlapping shingle above, preventing water penetration. Drive the nails straight and flush with the shingle surface, but avoid overdriving them, which can damage the shingle material.
- Apply quarter-sized dabs of roofing cement and press firmly: This is the critical step for creating a watertight seal and ensuring wind resistance. Apply three small, quarter-sized dabs of asphalt roofing cement under the tabs of the new shingle, evenly spaced along its length. Also, apply dabs under the tabs of the shingle above the newly installed one, especially if its sealant bond was broken during removal. Press the shingles down firmly into the cement. New shingles may seal to adjacent shingles over time with sun warmth, but manual sealing with cement is recommended for immediate wind resistance. We use this technique to ensure your roof is immediately protected from the elements.
Should you encounter unexpected challenges or larger issues during your repair, we offer emergency roof repair services for our neighbors in Temple, TX, and Leander, TX.
Roofing Sealants Explained: Cement, Tar, and Sealant
Choosing the correct product is critical for a durable repair. Using the wrong material or applying it improperly can compromise your roof’s integrity and lead to more leaks down the road. It is a common misconception that all sticky roofing products are interchangeable. Let’s explain the differences between roofing cement, roofing tar, and roof sealant so you can choose the right material and know when to call an experienced Central Texas roofing specialist.
| Product | Composition | Primary Use | Durability | Best Application for Asphalt Shingles |
|---|---|---|---|---|
| Roofing Tar (Roofing Cement) | Asphalt emulsion with fibers, mineral spirits, and additives | Temporary repairs of small holes, sealing gaps around chimneys and corners, reattaching loose shingles | About 1–3 years as a stand-alone patch | Quick, isolated fixes on small cracks, nail holes, or lifted shingle tabs while waiting for a permanent repair. Apply sparingly to avoid trapping moisture. |
| Roofing Cement (Mastic) | Thicker, fiber-reinforced asphalt-based paste, cold-applied | More robust temporary repairs, filling larger cracks or holes, re-adhering loose shingles more securely | About 1–3 years (still considered temporary) | Repairing small holes from tree branches or torn shingles, securing edges of new shingles, and sealing nail heads. |
| Roof Sealant | Typically liquid rubber, silicone, or polyurethane-based waterproofing compound | Creating flexible, watertight seals around penetrations, flashing, and transitions | Generally longer-lasting than tar or cement when used as directed | Sealing around vents, chimneys, skylights, and flashing. Certain specialized products can help address minor granule loss and extend shingle life. |
When to Use Roofing Cement
Roofing cement is a fiber-reinforced, asphalt-based paste ideal for re-adhering loose shingles and patching small holes. It is the “duct tape” of roofing—cheap, widely available, and highly versatile—but it is not a substitute for proper shingle replacement or flashing repair. It is best used for minor repairs and should be applied sparingly to avoid blistering shingles. Over-application can restrict water flow, trap heat, accelerate shingle aging, and even lead to more leaks or blisters by trapping moisture. Always read the product instructions, and ensure the surface is completely dry before application. Discover the different types of roof cement and their specific uses.
When to Call a Professional
Knowing your limits is a sign of a smart homeowner. While we encourage DIY for simple shingle patches, there are definite situations where calling us is the safest and most effective option.
It is time to book a call with an expert if:
- The damage is near flashing: Flashing is critical for directing water away from vulnerable areas like chimneys, vents, and wall intersections. Improper repairs here can lead to significant leaks.
- It involves more than a simple shingle: If the problem extends beyond one or two shingles, or if you suspect damage to the underlayment or roof deck underneath, it’s best to have a professional assess it.
- You notice underlying rot: Soft or spongy spots on your roof deck indicate rot, a serious issue that requires expert intervention.
- You’re uncomfortable with heights or working on a roof: Your safety is our top priority. Don’t risk injury for a repair.
- You suspect widespread damage or multiple leaks: These issues often point to systemic problems that require a comprehensive solution, not just a patch.
EMC Remodeling offers comprehensive roof repair and emergency services in Temple, TX, Leander, TX, and surrounding Central Texas areas. We pride ourselves on exceptional craftsmanship, direct owner involvement, and 24/7 emergency support. If you’re unsure, it’s always better to get a professional opinion.
After the Patch: Avoiding Mistakes and Maintaining Your Roof
Congratulations, you’ve successfully patched your asphalt shingle roof. But a successful patch is just the beginning. Ongoing maintenance extends the life of your roof and prevents future issues, ensuring your home remains protected from the Texas elements. Avoiding common DIY pitfalls and adopting a routine maintenance schedule will safeguard your investment and reduce the likelihood of expensive emergency roof repair calls.
Common DIY Mistakes to Avoid
- Using mismatched shingles: While a watertight seal is the priority, using shingles that don’t match in color, material, or quality can ruin your roof’s appearance and signal that different materials are aging at different rates. A mismatched shingle is always better than a leaky one, but try your best to find a close match.
- Over-applying sealant: More isn’t always better when it comes to roofing cement. Over-applying sealant can trap moisture underneath, leading to bulges, blisters, or even rot. Apply quarter-sized dabs sparingly, as instructed.
- Ignoring underlayment damage: The underlayment is your roof’s secondary water barrier. If you remove a shingle and find the underlayment torn or damaged, simply covering it with a new shingle isn’t enough. Always repair underlayment damage with a patch of 30# tarpaper and roofing cement before installing the new shingle.
- Poor nailing technique (overdriven, underdriven, or angled nails): Nails driven too deep can cut through the shingle, while underdriven or angled nails won’t secure it properly and can even create new leak points. Ensure nails are driven flush with the shingle surface, but not overdriven, and are placed correctly below the sealant strip.
Long-Term Roof Maintenance Tips
- Conduct regular inspections, especially after storms: We recommend inspecting your roof every few months and always after severe weather events like hailstorms or strong winds. Look for loose, cracked, curled, or missing shingles, and any signs of damage to flashing or gutters.
- Keep gutters clean to prevent water backup and ice dams: Clogged gutters prevent proper water drainage, allowing water to back up under shingles and potentially leading to leaks, wood rot, and even foundation issues. In colder months, this can contribute to ice dam formation. Clean them regularly, especially after fall and heavy storms.
- Trim overhanging tree branches: Branches rubbing against your roof can abrade shingles over time, causing granule loss. Falling branches can directly damage shingles or even puncture the roof. Keeping them trimmed back prevents these issues and reduces debris accumulation on your roof.
- Schedule an annual professional inspection: While DIY inspections are valuable, a professional can identify subtle issues you might miss, such as damaged flashing, early signs of rot, or problems with ventilation. An annual inspection helps us catch small problems before they become major repairs.
Learn more about our handyman roof repair services if you need assistance with ongoing maintenance or minor repairs.
Frequently Asked Questions About Asphalt Shingle Repair
How long does a patched roof shingle last?
A properly patched shingle is a permanent repair, not a temporary fix. When done correctly with the right materials (matching shingle, galvanized nails, quality roofing cement) and technique (proper nailing and sealing), the new shingle becomes an integral part of the roofing system and should last as long as the surrounding shingles. The key is correct nailing and a watertight seal with roofing cement.
What if I can’t find an exact match for my shingle?
This is a common issue, especially with older roofs where the original shingle color may have faded or the product line discontinued. The priority is always to create a watertight seal. If an exact color and style match isn’t available, we recommend finding a shingle that is as close as possible. A slight color mismatch is far better than a leak. A pro-tip we often share is to “harvest” a shingle from a less visible part of your roof (like over a garage or a back slope) and use the new, slightly mismatched shingle in that less noticeable spot.
When should I call a professional instead of doing it myself?
While patching one or two shingles is a manageable DIY project for many homeowners, there are specific situations where calling a professional is strongly advised for your safety and the longevity of your roof:
- Widespread damage: If you see multiple damaged shingles across different areas of the roof, it’s often a sign of a larger underlying problem.
- Soft spots on the roof deck: Feeling any soft or spongy spots underfoot indicates potential rot in the roof decking, which requires professional assessment and repair.
- Steep roof pitch: Working on a steeply sloped roof requires specialized safety equipment and expertise that most homeowners don’t possess.
- Discomfort with heights: Your safety is paramount. If you are not 100% comfortable working on a ladder or at heights, it is always best to hire an expert.
- Damage involving flashing or other complex components: Repairs around chimneys, vents, skylights, or valleys are intricate and crucial for preventing leaks.
For any of these scenarios, or if you simply prefer peace of mind, contact our expert roofers in Temple, TX or Leander, TX. We’re here to help.
Protect Your Home: Know When to Call the Experts
Patching a single asphalt shingle roof is a manageable DIY task for many homeowners, empowering you to quickly address minor issues and extend the life of your roof. However, widespread damage, underlying rot, or issues with flashing require professional attention. For complex repairs or expert assessment in the Temple, TX, and Leander, TX areas, trust EMC Remodeling—a family-operated business dedicated to exceptional craftsmanship and 24/7 emergency support. We pride ourselves on being your trusted local partner, ensuring your roof provides optimal protection for your home. If your roof repair feels overwhelming, schedule a comprehensive roof repair service.
For more information on protecting your home and expert roofing solutions, visit our homepage.