Why Replacing Cedar Shingles Is Critical for Your Home’s Protection
Replacing cedar shingles is a critical task for maintaining your home’s structural integrity and curb appeal. When cedar shingles fail, they expose your home to costly water damage, rot, and energy loss. This guide will walk you through everything you need to know, from spotting warning signs to understanding the replacement process.
Key signs that your cedar shingles need replacement include curling, splitting, rot, moss growth, and missing shingles. Proper replacement involves removing old shingles, repairing the deck, and installing new materials with precise techniques. With proper care, a cedar roof can last 20-30 years, but it requires specialized knowledge, especially in Central Texas where intense weather accelerates wear. Understanding when and how to act is crucial for protecting your home investment.
I’m Matthew Runyon, President of EMC Remodeling & Roofing. With over 15 years of experience in Central Texas, I’ve helped countless homeowners steer the complexities of replacing cedar shingles, ensuring their roofs stand up to our harsh climate.
1. Know When It’s Time: Spotting the Warning Signs of Cedar Shingle Failure
Recognizing the warning signs of cedar shingle failure is key to preventing costly water damage. Most issues provide ample warning before becoming emergencies.
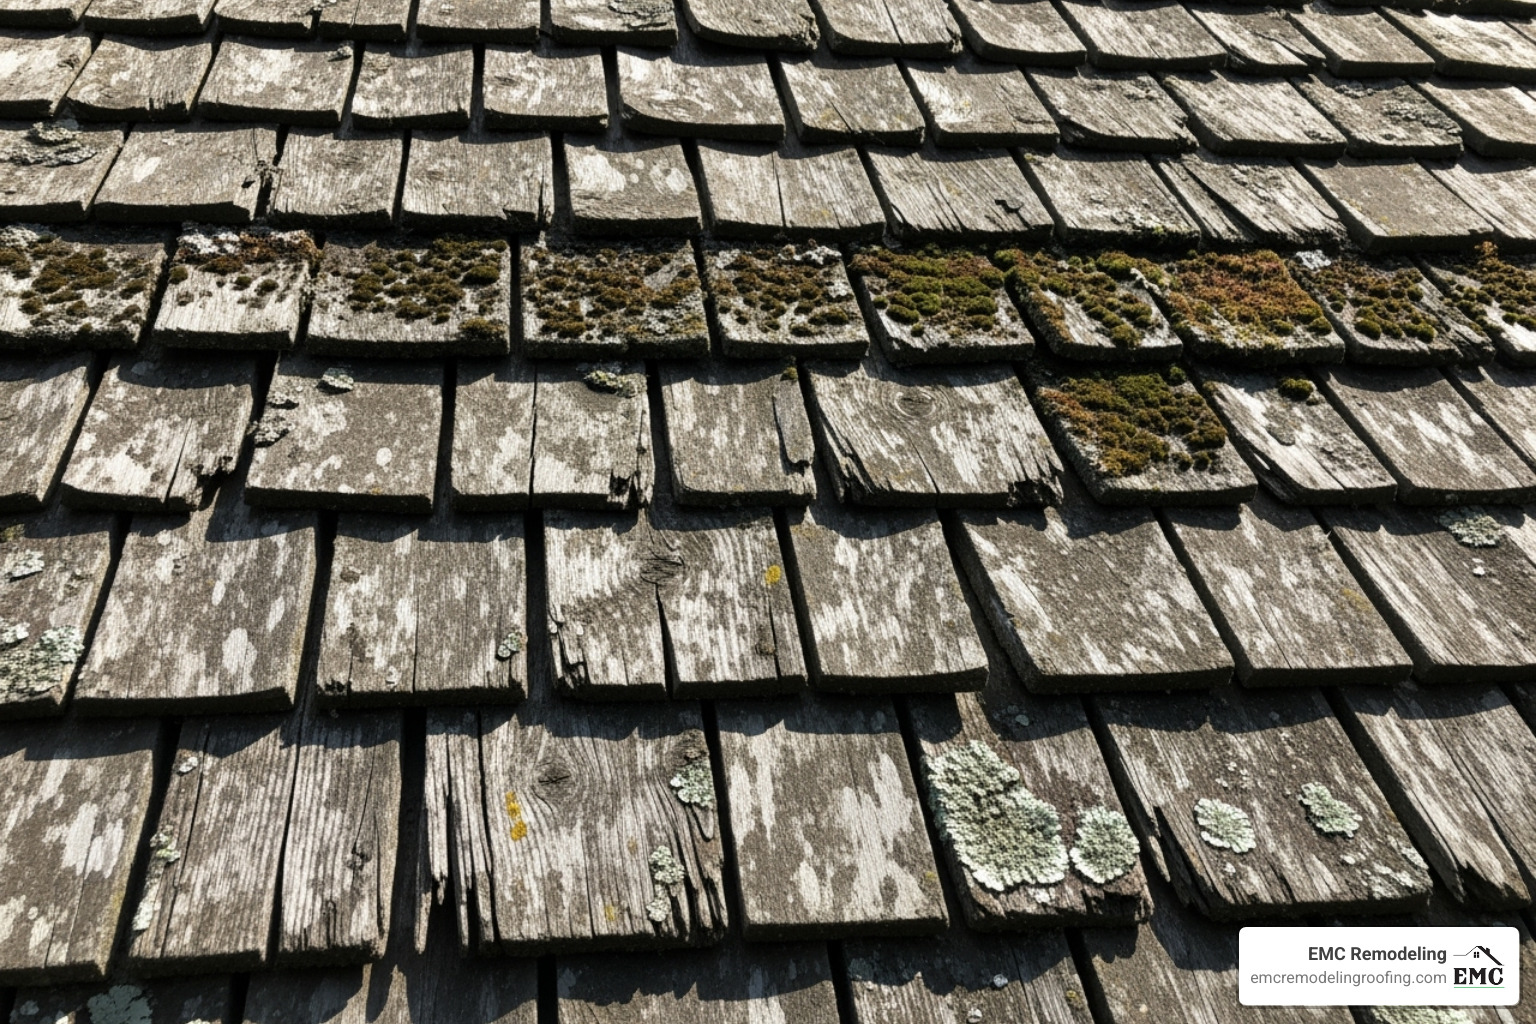
- Curling and Cupping: When shingles curl upwards or form a cup shape, it’s a sign of moisture and UV damage. While minor curling is normal with age, excessive cupping exposes the underlayment and signals failure.
- Splitting and Cracking: Cedar naturally moves with the weather. Natural splits have rounded, weathered edges. However, impact splits from hail have sharp edges and expose fresh, lighter wood. Document these for potential insurance claims.
- Moisture Damage (Rot, Moss, and Fraying): These are the most serious concerns. If shingles feel soft or spongy, they are rotting. Moss and algae growth indicate the roof isn’t drying properly, which traps moisture and leads to decay and frayed bottom edges. This is a common issue in Central Texas’s humid climate and highlights the need for proper attic ventilation.
- Missing or Loose Shingles: High winds or wear can dislodge shingles, leaving your roof deck exposed. A single missing shingle can lead to significant water intrusion and structural damage.
Distinguishing between natural aging and storm damage can save you thousands. The harsh Texas weather accelerates wear, making a professional roof inspection a wise investment to catch problems early. For storm-related issues, our Storm Damage Repair guide explains your options.
2. Cedar Shingles vs. Cedar Shakes: What’s the Difference?
Many homeowners use “shingles” and “shakes” interchangeably, but they are distinct products with different aesthetics. Understanding the difference is helpful when replacing cedar shingles.
- Cedar Shingles are Sawn: They are cut on both sides for a smooth, uniform appearance. This creates clean, straight lines for a more refined and polished look on your roof.
- Cedar Shakes are Split: They are traditionally hand-split from logs, resulting in a rustic, textured surface. Each shake is unique, with natural grooves and varying thicknesses that create deep shadow lines and an organic feel.
Despite these visual differences, the replacement process is fundamentally the same. The tools, nailing patterns, and need for expansion gaps are identical for both. The main consideration is matching the new material to your roof’s existing style and grade to ensure a seamless repair.
For detailed specifications on cedar grades, you can learn more from the Cedar Bureau, a leading authority on cedar products.
3. How Texas Weather Impacts Your Cedar Roof
Central Texas’s climate presents a unique set of challenges for cedar roofs, often making replacing cedar shingles a more frequent necessity than in milder regions.
- Intense UV Radiation: Relentless sun exposure dries out the wood, making shingles brittle and prone to cracking and splitting much faster than in cooler climates.
- High Humidity and Rain: Moisture creates a breeding ground for moss, algae, and mildew. These organisms trap water against the wood, promoting rot and decay, especially in shaded areas.
- Severe Storms: Hailstorms cause impact splits with sharp edges, while high winds can lift and tear away shingles, leaving your roof vulnerable to immediate water infiltration. For help after a storm, see our Storm Damage Repair guide.
While a well-maintained cedar roof can last 20-30 years, the combination of these factors in Texas can shorten its lifespan. Proper attic ventilation is critical in our climate to prevent moisture buildup from within, which can rot your roof deck and shingles from the underside. Good ventilation helps your roof system manage the extreme heat and humidity, protecting your investment.
4. Gearing Up: Tools and Materials for Cedar Shingle Replacement
Having the right equipment is essential before you begin replacing cedar shingles. A proper setup ensures safety and a professional result.
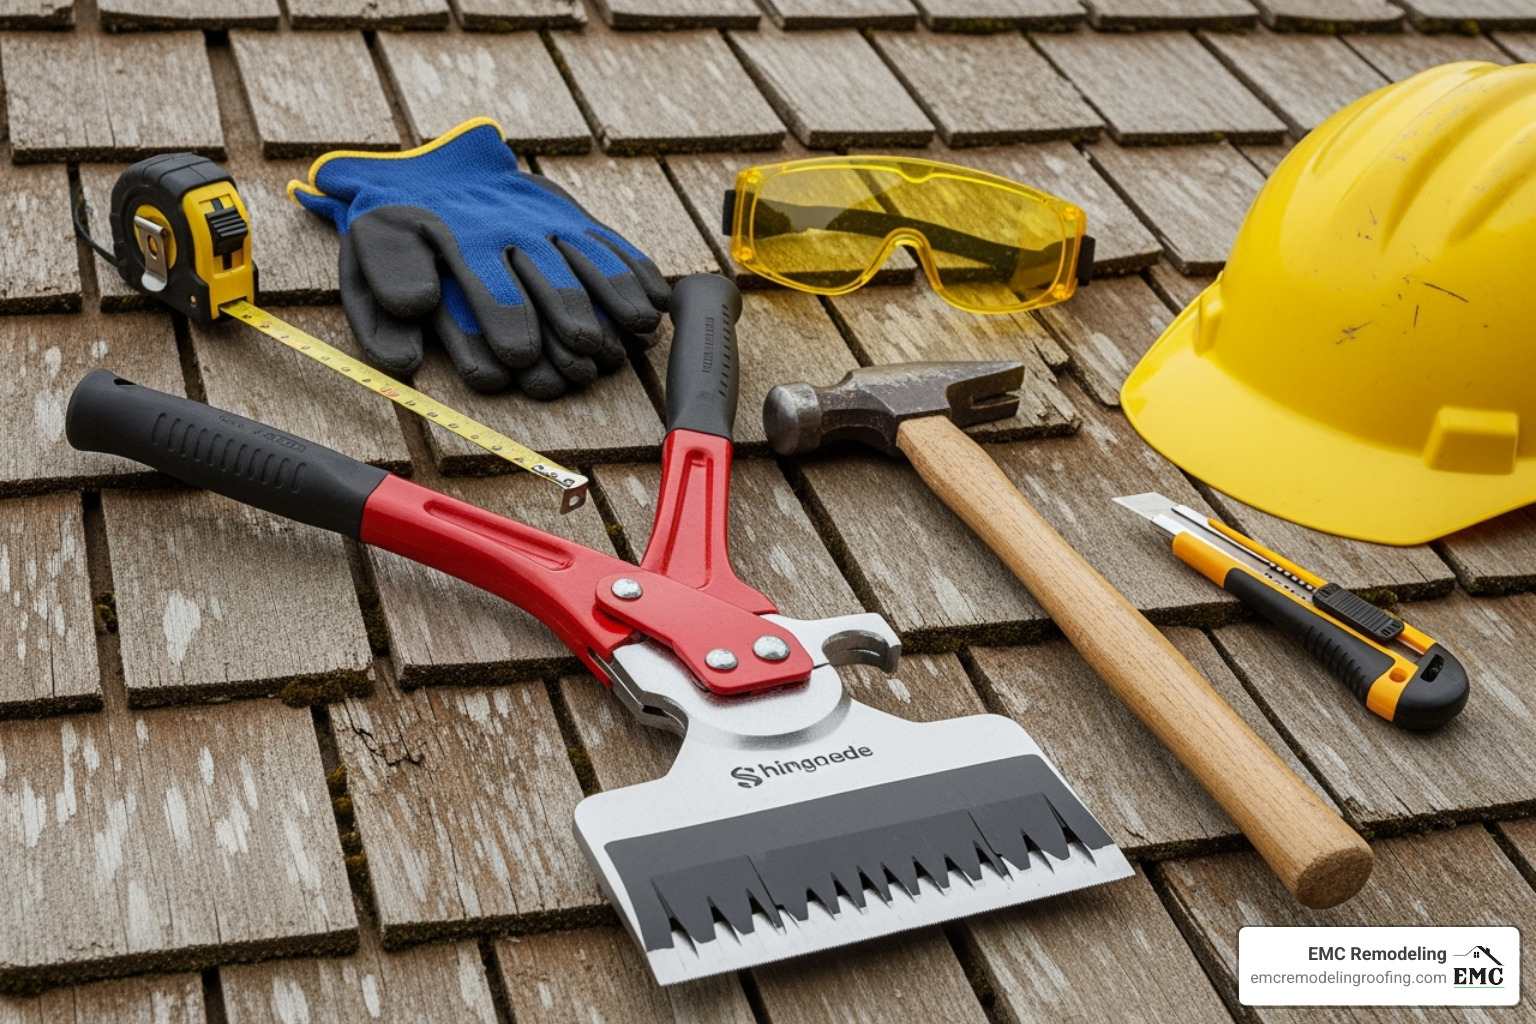
Must-Have Tools
- Safety Gear: Non-negotiable. Includes quality gloves, safety goggles, a hard hat, and proper fall protection.
- Shingle Ripper (Slater’s Tool): A specialized tool for removing nails from under shingles without damaging adjacent ones.
- Hammer & Pry Bar: For driving new nails and lifting stubborn shingles.
- Utility Knife & Chalk Line: For cutting shingles cleanly and marking straight exposure lines.
- Measuring Tape & Block Plane: For accurate measurements and fine-tuning shingle edges for a flush fit.
- Power Saw: A circular or reciprocating saw is useful for larger cuts or slicing through old nails.
See essential tools for the job
Materials Checklist
- Replacement Cedar Shingles: Match the existing grade and type as closely as possible.
- Nails: Use stainless steel or hot-dipped galvanized nails to prevent rust stains and ensure longevity.
- Roofing Underlayment: Rosin paper is often preferred for cedar as it accommodates the wood’s natural movement. Building paper or housewrap are also suitable.
- Wood Sealant & Flashing: Keep sealant on hand for minor cracks and aluminum flashing for temporary repairs to prevent water intrusion.
Browse our Project Gallery for material inspiration to see how these materials come together on homes throughout Central Texas.
5. Step-by-Step: How to Replace Cedar Shingles Like a Pro
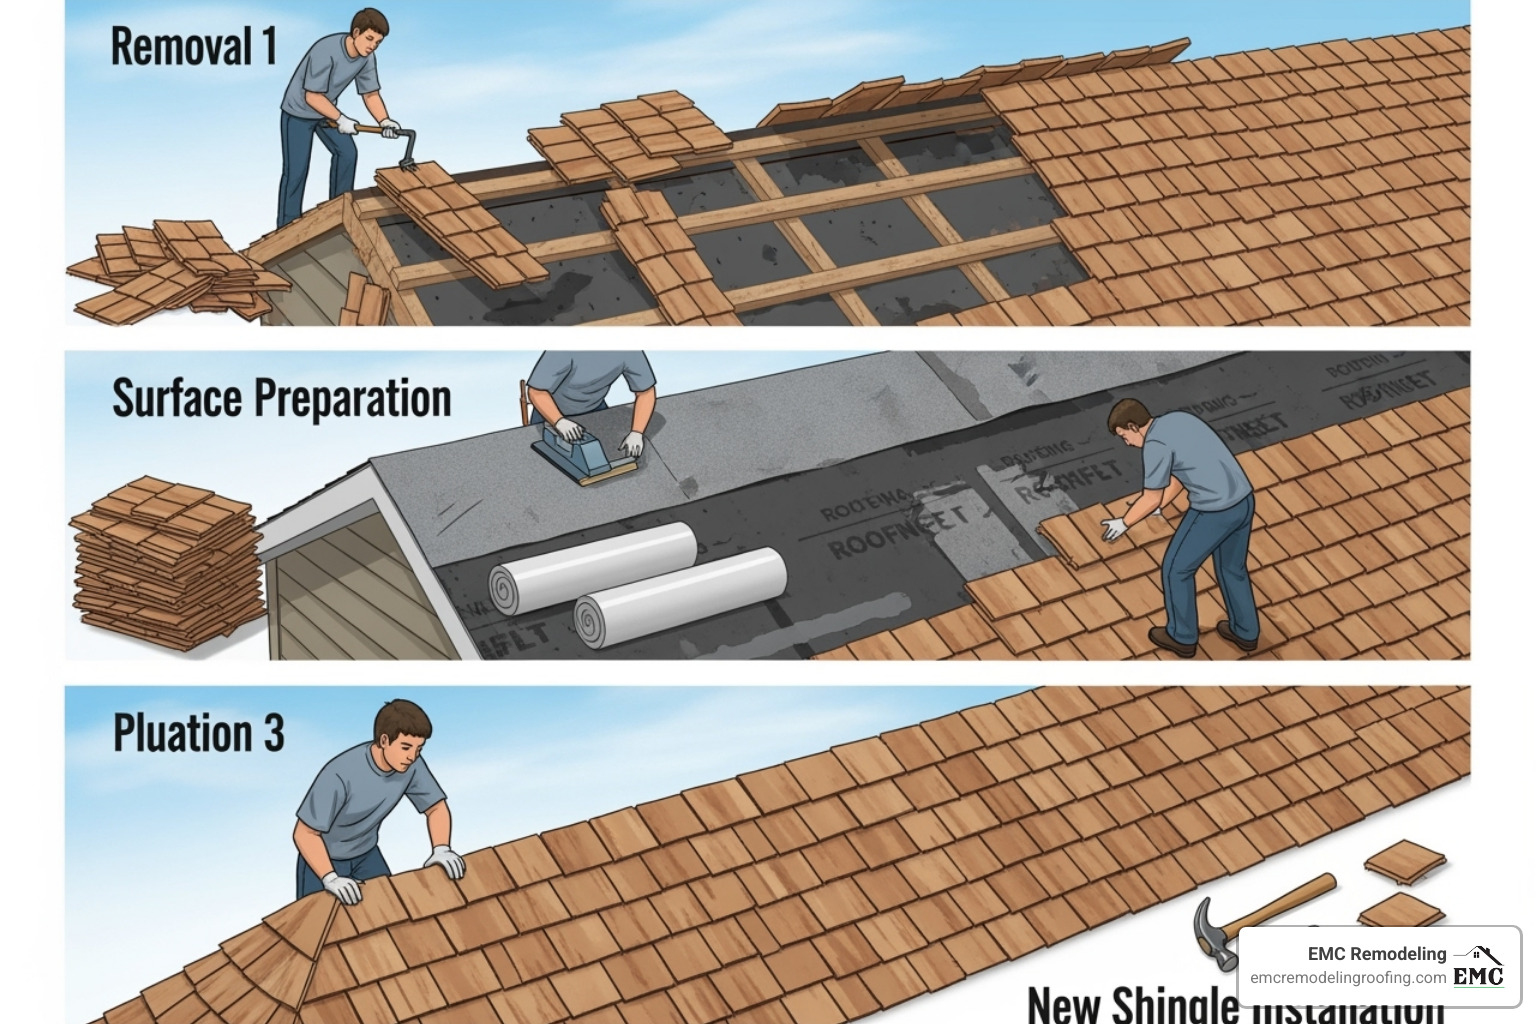
Replacing cedar shingles requires a methodical approach to ensure a durable, watertight repair. This walkthrough covers the key steps. For widespread damage, our Emergency Roof Repair Complete Guide offers more detailed advice.
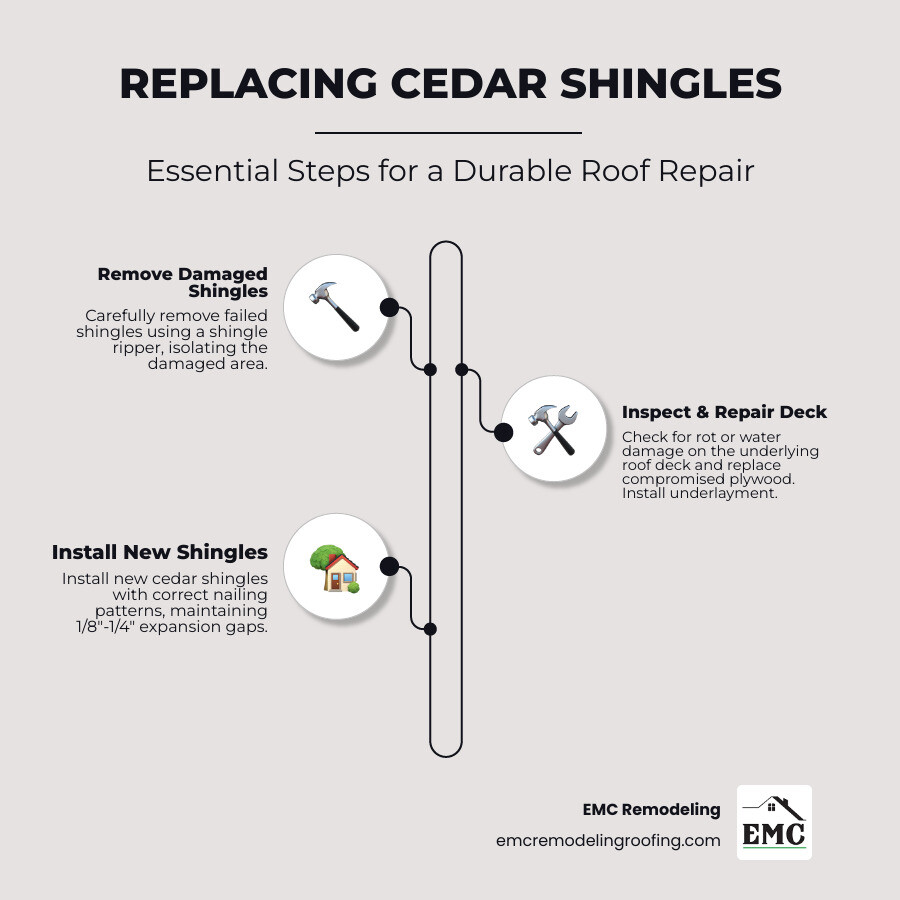
Step 1: Remove Damaged Shingles
- Isolate the Damage: Carefully identify all shingles that are cracked, rotting, or curled.
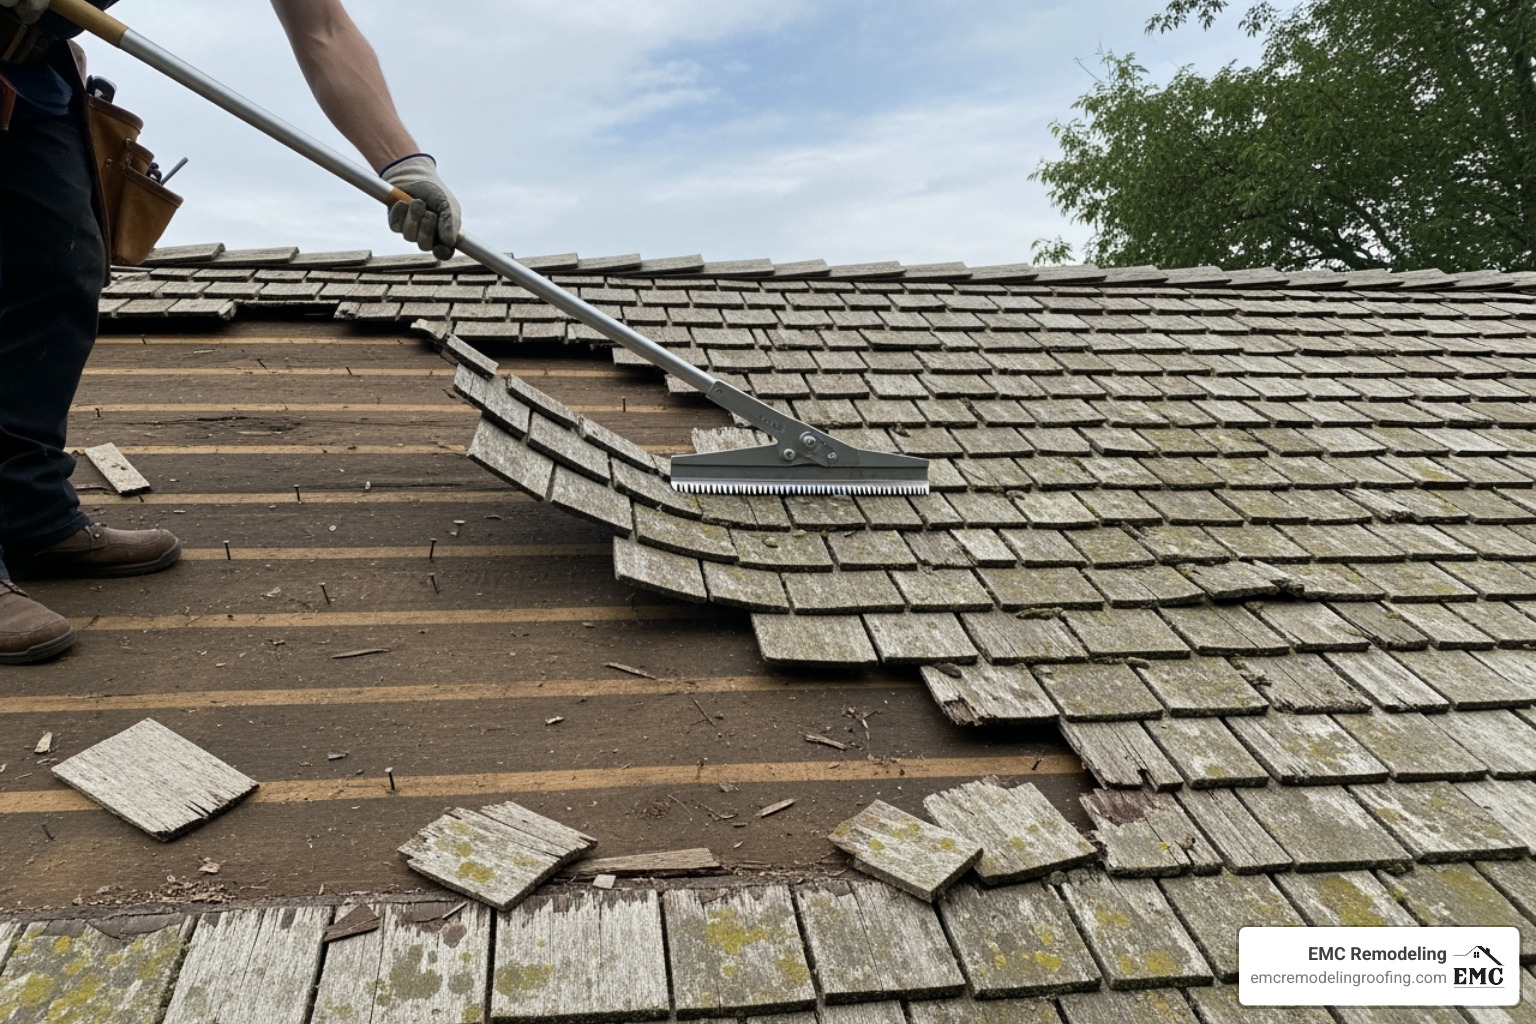
- Use a Shingle Ripper: Slide the tool under the damaged shingle to hook and pull or shear off the hidden nails. This is the best way to avoid harming surrounding shingles.
- Handle Stubborn Shingles: If a shingle won’t budge, use a hammer and chisel to split it into smaller, vertical pieces that can be removed more easily.
- Protect Good Shingles: Work carefully to prevent damaging the intact shingles around the repair area.
Step 2: Inspect and Repair the Roof Deck
- Check for Rot: With the old shingles removed, inspect the exposed roof deck (sheathing) for water stains, soft spots, or rot.
- Replace Damaged Wood: If you find compromised plywood, cut out the entire damaged section and replace it with new sheathing. Secure it firmly to create a solid foundation.
- Ensure a Flat Surface: Your new shingles need a solid, flat base to perform correctly. Don’t skip this step. If you find extensive issues, consider our Roof Repair Services.
Step 3: Install Underlayment and New Shingles
- Install Underlayment: Lay down rosin paper or another suitable underlayment over the repaired deck, overlapping rows by at least 2 inches to shed water.
- Follow Nailing Pattern: Use two nails per shingle, placed about 3/4 to 1 inch from each edge and 1 inch above the exposure line of the next course. This keeps the nails hidden and secure.
- Maintain Expansion Gaps: Leave a 1/8-inch to 1/4-inch gap between shingles. Cedar expands and contracts with moisture, and this gap prevents buckling.
- Weave Corners: For a professional, watertight finish on corners, alternate the overlap of shingles from each side and trim them flush.
- Blend New Shingles: New cedar will be lighter in color but will naturally weather to a gray that matches the rest of your roof over time.
6. DIY vs. Professional Cedar Shingle Replacement: What’s Best for Your Roof?
Deciding whether to DIY or hire a professional for replacing cedar shingles is a major consideration. While DIY can seem cheaper, cedar roofing is a specialized skill where mistakes can be costly and dangerous.
DIY vs. Professional: A Quick Comparison
| Feature | DIY Approach | Professional Service |
|---|---|---|
| Cost | Lower upfront material cost. | Higher initial cost, but includes labor, warranty, and expertise. |
| Safety | High risk of falls and injury without proper equipment and training. | Professionals use certified safety gear and follow strict protocols. |
| Quality | Risk of improper installation, leading to leaks, buckling, and premature failure. | Guaranteed quality with correct nailing, spacing, and flashing techniques. |
| Warranty | May void manufacturer material warranties. | Preserves material warranties and includes a workmanship warranty. |
| Time | Can take multiple weekends, leaving the roof exposed. | Fast and efficient, minimizing disruption and exposure to elements. |
Why Professional Installation is a Smarter Investment
The risks of a DIY cedar roof repair often outweigh the savings. Incorrect nailing, improper spacing, or failing to spot underlying deck damage can lead to expensive water damage down the road. Furthermore, working on a roof without professional safety equipment is a significant hazard.
When you hire a certified company like EMC Remodeling, you’re investing in peace of mind. Our specialists understand how cedar behaves in the Central Texas climate. We use the right tools, premium materials, and proven techniques to ensure your roof is beautiful, durable, and watertight. Our work is backed by a comprehensive workmanship warranty, protecting your investment for years to come. For a full overview, Read our Complete Roof Replacement Guide.
Name: EMC Remodeling
Address: 5100 Midway Dr Suite 211, Temple, TX 76502
Phone: (254) 760-9268
Google Map:
We proudly serve homeowners throughout Temple, Killeen, Belton, Central Texas, Lago Vista, Cedar Park, Leander, Pflugerville, and Salado. If you’re searching for a roofing contractor near me, we’re here to help.
7. Frequently Asked Questions about Replacing Cedar Shingles
Homeowners often have questions about replacing cedar shingles. Here are answers to some of the most common ones we hear in Central Texas.
How much does replacing cedar shingles cost?
The cost varies significantly. A full cedar roof replacement in Central Texas typically ranges from $17,000 to $26,000, depending on your home’s size and the project’s complexity. This is about twice the cost of asphalt but offers superior longevity and beauty. Individual shingle repairs are much more affordable and are a cost-effective way to extend your roof’s life if damage is caught early. For an accurate quote, it’s best to schedule a professional roof inspection.
Can you install new shingles over an old cedar roof?
No, the old cedar roof must be completely removed. Installing new shingles over an old, irregular cedar surface creates an unstable base, traps moisture that leads to rot, and adds excessive weight to your home’s structure. A full tear-off is the only way to properly inspect the roof deck for damage and ensure your new roof is installed correctly and will last its full lifespan. Most manufacturer warranties also require a tear-off.
What are the best alternatives to natural cedar shingles?
If you love the look of cedar but want different performance or maintenance features, there are excellent alternatives:
- Synthetic (Composite) Cedar Shakes: These products mimic the look of real cedar but offer improved durability. They often come with Class 4 impact resistance (ideal for hail), a Class A fire rating, and 50-year warranties. They are resistant to rot, moisture, and insects, requiring very little maintenance. The initial cost is higher, but the long-term value is significant.
- Fiber Cement Shingles: Another durable option that mimics the appearance of wood but is resistant to fire, moisture, and pests.
- Architectural Asphalt Shingles: High-quality dimensional shingles can offer a wood-shake appearance at a lower cost and with less maintenance.
EMC Remodeling can also install James Hardie Siding for a complete, durable, and low-maintenance home exterior.
8. Protect Your Investment: Trust Central Texas’s Cedar Roofing Experts
Your cedar roof is a significant investment in your home’s value and protection. Replacing cedar shingles is a specialized craft that, when done correctly, preserves that investment for decades. From identifying subtle signs of wear to executing a flawless installation, every detail matters—especially in the demanding Central Texas climate.
Improper installation can lead to premature failure and costly water damage. Don’t risk your home’s integrity. At EMC Remodeling, our family-operated team has over 15 years of experience with cedar roofing in Temple and the surrounding areas. We understand how to make cedar roofs last in our unique environment, combining expert craftsmanship with direct owner involvement on every project.
Whether you need a few shingles replaced or a full roof restoration, we provide the expertise your home deserves. Protect your investment with a team that knows cedar inside and out.
Ready to restore the beauty and safety of your cedar roof? Contact us today for a free consultation on our expert Roof Replacement services!
