Why Prompt Roof Tile Replacement Saves You Money and Headaches
When a roof tile is damaged, a roof tile replacement becomes an urgent priority to protect your home. Fortunately, most single-tile repairs can be done in a few hours with the right tools and techniques. For Central Texas homeowners, severe weather makes having reliable professional roofing services essential when tile problems arise.
Quick Steps for Roof Tile Replacement:
- Safety First: Use proper ladder placement, safety gear, and only work in dry conditions.
- Remove Damaged Tile: Lift surrounding tiles with wooden wedges and break out the damaged piece.
- Install New Tile: Slide the replacement tile into position and secure it with clips or adhesive.
- Call Professionals: Contact experts for steep roofs, multiple broken tiles, or signs of structural damage.
Research shows that slipped or broken tiles cause 75% of roof leaks, making quick action critical. Addressing damage to clay, concrete, or slate tiles promptly prevents water damage that can cost thousands. As President of EMC Remodeling, I’ve seen how proper repairs extend a roof’s lifespan by decades, protecting countless homes in the Temple area.

Learn more about roof tile replacement:
Identifying the Problem: Tile Types, Damage, and Lifespans
Before starting a roof tile replacement, it’s crucial to understand your roof’s materials, the type of damage, and the warning signs. A thorough roof and attic inspection can identify issues before they escalate into costly headaches.
 - roof tile replacement")
Common Roof Tile Materials and Causes of Damage
Each roofing material has a unique lifespan and vulnerabilities, especially in Central Texas.
- Clay Tiles: Highly durable, lasting 80-100 years. They resist fire and insects but can be cracked by hail or falling debris.
- Concrete Tiles: A versatile and affordable option with a lifespan of 50-60 years. They can mimic other materials but are susceptible to cracking and color fading over time.
- Slate Tiles: A premium material lasting 50-100+ years. Slate is incredibly durable but brittle and requires specialized repair techniques.
- Composite Alternatives: Made from recycled materials, these tiles offer Class 4 impact resistance and Class A fire ratings, often with 50-year warranties. They are lightweight and durable, making them an excellent choice for areas prone to severe weather.
In Central Texas, the primary culprits for tile damage are severe weather, including high winds and wind-driven rain. Hail damage is particularly destructive, and our team has extensive experience with hail damage roof repair. Other causes include falling tree branches, improper foot traffic, freeze-thaw cycles that widen cracks, and general age-related deterioration. Widespread issues may require comprehensive storm damage repair to address underlying problems.
Telltale Signs You Need a Roof Tile Repair
Your roof will show clear signs when it needs attention. Acting on these warnings can save you from major water damage.
- Visible Cracks or Missing Tiles: These are direct entry points for water and should be addressed immediately.
- Slipped or Misaligned Tiles: This indicates a failure in the fastening system, compromising the roof’s integrity.
- Moss or Algae Growth: Traps moisture against the tiles, accelerating deterioration.
- Water Stains on Interior Ceilings: A sure sign of a leak, even if the entry point is far from the stain.
- Increased Energy Bills: Damaged tiles can compromise insulation, forcing your HVAC system to work harder.
If you notice these signs, don’t wait. A prompt, professional roof repair can prevent a small issue from becoming a disaster.
Preparing for the Job: Safety, Tools, and Materials
Proper preparation is key for a successful roof tile replacement, especially when working at height. Planning and safety should always be your top priorities.

Essential Safety and Tools
Roofing accidents are common, so follow safety guidelines like those from the Health and Safety Executive for working at height. Never work on a wet or windy day.
- Safety Gear: Always use a securely placed ladder that extends three feet above the roofline. For any steep roof, a safety harness anchored to a stable point is non-negotiable. Wear safety glasses and work gloves.
- Essential Tools: Your toolkit should include a pry bar, hammer, trowel, caulk gun with roofing adhesive, and wooden wedges to prop up adjacent tiles. For slate repairs, you will need specialized tools like a slate ripper and slate hammer.
- Fasteners: Depending on your roof system, you may need tile clips or roofing nails to secure the new tile.
Sourcing the Right Replacement Tiles
Finding a perfect match for your existing tiles is crucial for both aesthetics and weatherproofing. An ill-fitting tile can create gaps and lead to leaks.
Start by taking a sample of the broken tile to a local roofing supplier. They can often identify the manufacturer, style, and color. For older or discontinued tiles, architectural salvage yards are an excellent resource. While it may take extra effort, finding an exact match ensures a seamless and effective repair, preserving your home’s curb appeal and protection.
How to Perform a Roof Tile Replacement: A Step-by-Step Guide
With your safety gear on and tools ready, you can begin the roof tile replacement. Patience is key to avoiding damage to surrounding tiles.

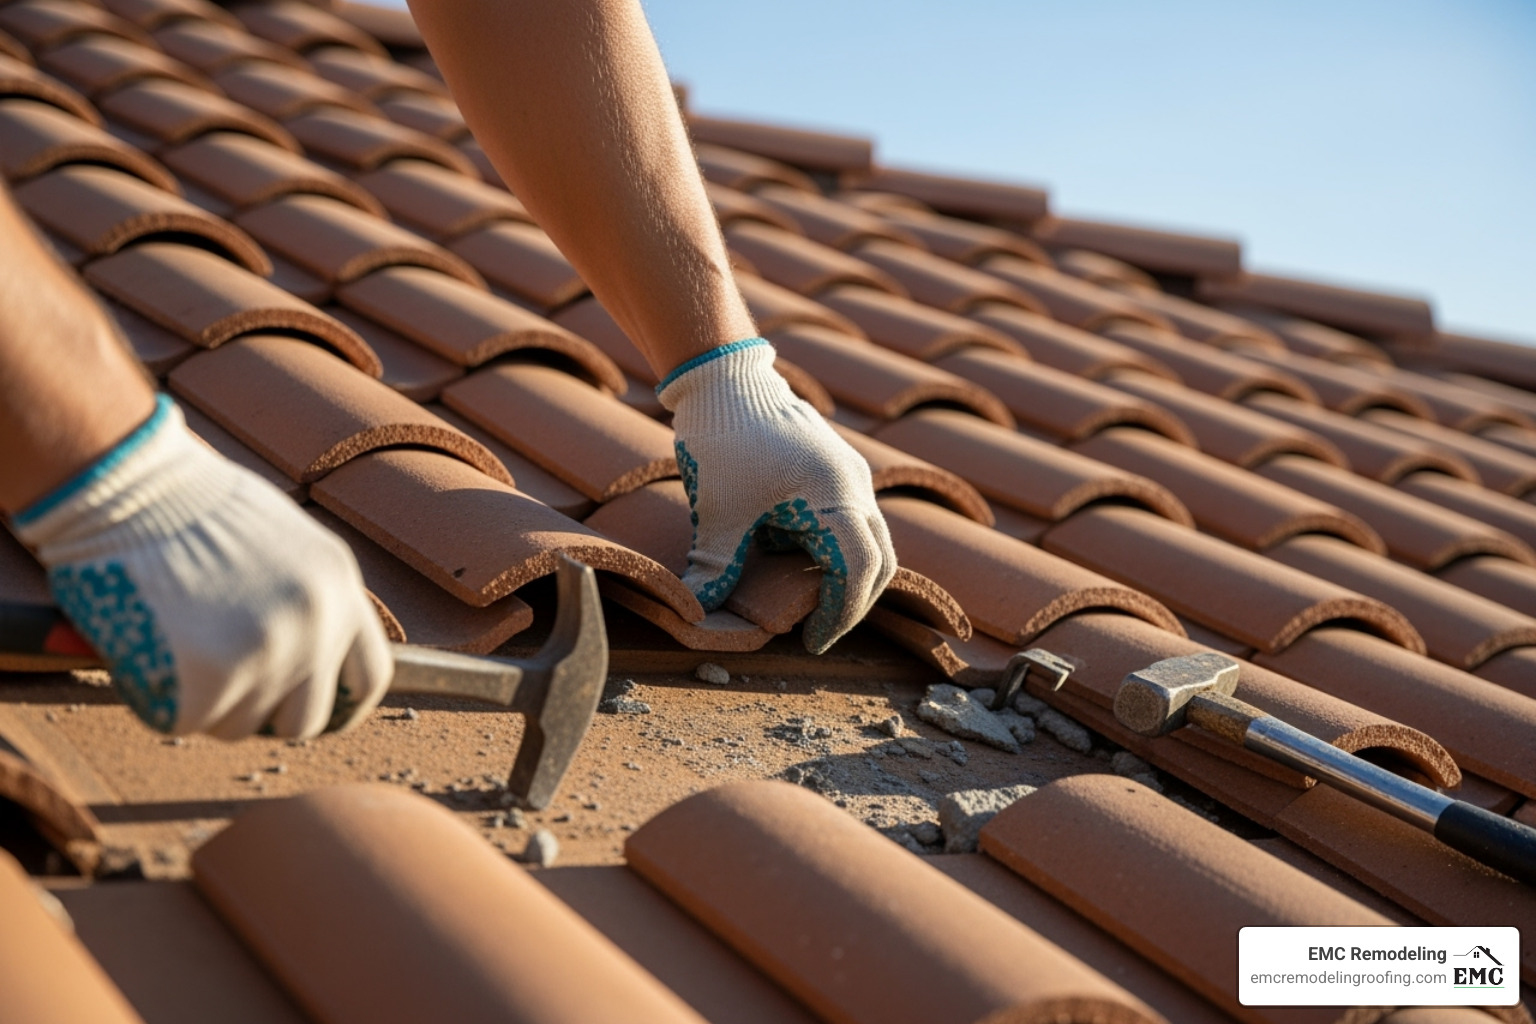
Replacing a Standard Concrete or Clay Tile
Most modern roofs use interlocking concrete or clay tiles. The process involves isolating the damaged tile without disturbing its neighbors.
- Lift Surrounding Tiles: Gently use a pry bar to lift the tiles above and around the damaged one. Slide wooden wedges underneath to hold them up, creating a workspace.
- Remove Damaged Tile: Break the damaged tile into smaller pieces with a hammer for easy removal. If the tile is held by nails, break it near the nail and then pull the nail out separately.
- Clean the Area: Clear away all debris and old nails from the exposed roof deck or underlayment.
- Install New Tile: Carefully slide the new tile into position, ensuring its interlocking edges align with the adjacent tiles. It should sit flush without being forced.
- Secure the Tile: Fasten the new tile using a tile clip nailed to the batten or apply a bead of roofing adhesive under the overlaps for a secure, watertight seal. If the tile has nail holes, use them.
- Finalize: Remove the wooden wedges and allow the overlapping tiles to settle back into place.
Replacing a Slate Roof Tile
Slate requires special tools and a different technique. You’ll need a slate ripper to cut the nails holding the old slate and a slate hammer.
After cutting the nails and removing the broken slate, slide the new one into place. Since you cannot nail through the top of the slate, it is secured from underneath with a copper nail and a metal strip (a “bib”). This hidden fastener is slid under the slate above and hooked onto the new slate, providing a durable, invisible hold. This process is best left to professionals if you are inexperienced.
When Quick Fixes Aren’t Enough
Minor cracks can be temporarily sealed with roofing sealant, and curled asphalt shingles can be flattened with roofing cement. However, these are temporary solutions. If you see widespread damage, multiple broken tiles, or persistent leaks, these quick fixes are insufficient. It’s a clear sign that you need a professional roof repair service to assess the roof’s condition and perform a lasting repair.
The Bottom Line: Costs, Timelines, and Professional Help
Understanding the potential costs, project duration, and when to call an expert is crucial for any homeowner planning a roof tile replacement.

Understanding the Cost of Roof Tile Replacement
The cost varies based on material, roof accessibility, and the extent of the damage. Slate tile repairs are the most expensive, ranging from $40 to $200 per tile, due to the specialized labor required. Clay tile replacement is more moderate, typically costing $9-$21 per square foot. A steep, multi-story roof will always cost more to repair than an easily accessible single-story home. If underlying damage is found, the cost to replace underlayment on a tile roof will significantly increase the project’s scope and price.
Project Timeline and What to Expect
A single tile replacement on a low-slope roof can often be done in a few hours. A larger section repair may take a full day or more. The biggest variable is weather; work must be paused during rain or high winds, which can cause delays. Sourcing rare or discontinued tiles can also extend the project timeline.
DIY vs. Hiring a Professional Roofer in Temple, TX
Deciding between DIY and hiring a pro comes down to the job’s complexity and your comfort level with heights.
DIY is a viable option for a single, broken tile on a low-slope, easily accessible roof. If you have the right tools and safety knowledge, you can save on labor costs.
Hiring a professional is essential for steep roofs, multiple damaged tiles, or any sign of underlayment damage. Professionals have the experience and safety equipment to handle complex jobs efficiently. For Central Texas homeowners in Temple, Killeen, and Belton, EMC Remodeling provides expert roofing and repair services custom to our region’s unique weather challenges.
EMC Remodeling
5100 Midway Dr Suite 211, Temple, TX 76502
Phone: (254) 760-9268
Frequently Asked Questions about Roof Tile Replacement
Here are answers to some of the most common questions homeowners have about roof tile replacement.
How can I extend the life of my tile roof?
Consistent maintenance is the key to a long-lasting tile roof.
- Conduct regular inspections, especially after severe weather, to spot cracks or slipped tiles early.
- Keep gutters clean to prevent water from backing up under the tiles and damaging the underlayment.
- Remove leaves and debris promptly, as they trap moisture and can lead to moss growth.
- Address minor repairs immediately to prevent them from becoming major leaks. A professional roofing services inspection can identify issues you might miss.
What are the benefits of using synthetic or composite roof tiles?
Modern synthetic tiles are an excellent alternative to traditional materials. Their main benefits include:
- Lightweight: They put less stress on your home’s structure.
- Durability: Many have a Class 4 impact rating for hail resistance and a Class A fire rating.
- Longevity: They often come with 50-year warranties.
- Eco-Friendly: Most are made from recycled materials.
- Versatility: They are available in a wide variety of styles that mimic natural slate or clay.
Can I replace a roof tile from inside the attic?
No. Roof tile replacement must be done from the exterior. Tiles are designed to interlock and shed water, and they can only be properly removed and installed from above. Attempting a repair from the attic is ineffective and extremely unsafe, as it creates a significant risk of falling through the ceiling. If you see evidence of a leak from your attic, use that information to locate the damaged area on the roof’s exterior.
Conclusion
A timely roof tile replacement is a critical investment in your home’s protection. From identifying cracked tiles to understanding the repair process, taking prompt action prevents minor issues from escalating into costly water damage. A small repair today can save you from a major headache tomorrow.
Always prioritize safety. While replacing a single tile on a low-slope roof can be a manageable DIY task, complex jobs are best left to professionals. Steep pitches, multiple damaged tiles, or suspected underlayment issues require the expertise and equipment of an experienced roofer.
At EMC Remodeling, we understand that your roof protects your family and your most valuable asset. As a family-operated business serving Central Texas, we provide reliable repairs and comprehensive roof replacement services with the highest level of craftsmanship. For larger projects, our complete roof replacement guide offers additional insights.
If your roof has been damaged or you’re concerned about its condition, contact us today for a comprehensive evaluation. Let us ensure your roof is ready to withstand whatever the Texas weather brings.